UP HELLY AA
tips on low light/night photography which may help at this year's event
Below are a few tips on low light/night photography which may help at this year’s Up Helly Aa.
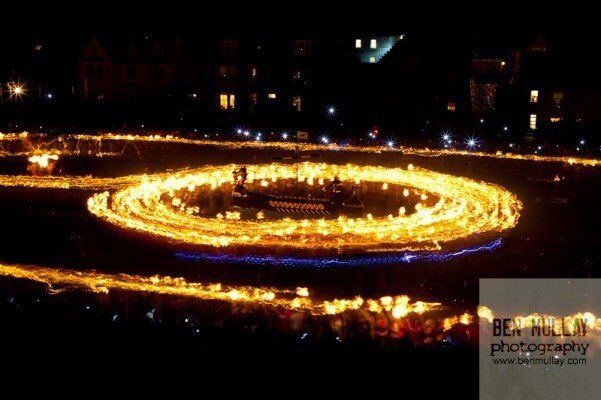
Up Helly Aa is a very difficult event to photograph, especially the procession as you’re going from essentially daylight conditions during the light up to virtually darkness once all the torches are lit.
For everything you need to know about Up Helly Aa, visit the official website here. If you cannot make it to Lerwick on Tuesday, Promote Shetland are streaming live online here.
All the best to this year’s Guizer Jarl Richard Moar and his squad. We’re sure it will be a day to remember and fingers crossed the weather is kind. Ok, so here we go…

1. Wrap up warm
This may sound obvious, but if you are dressed for the occasion you will be able to concentrate fully on photography and getting the best shots. A pair of thin, warm gloves can be invaluable to keep the circulation going so you can work with your camera. Don’t forget a good hat and lots of layers of clothing!
2. Stock up on Storage
Not having a good memory card inside your camera is like having a Ferrari with poor tyres. Having spent so much money on a good camera, it doesn’t make sense to skimp on the memory card.
At Camera Centre we recommend Delkin Black memory cards which are water, dust and shock proof.
They have a very high transfer rate up to 300MB/s which ensures your camera can perform the way it should.
Delkin Black cards are available from Camera Centre and come with a free lifetime replacement guarantee.
3. Travel Light
Try to minimize the amount of gear you take as you don’t want to get weighed down with equipment. If you’re using a Digital SLR, try to just take one lens as this will force you to be very considered with what images you capture.
4. Prepare your gear
Make sure all your batteries are fully charged (including a spare set) as at night your battery life can diminish in the colder conditions. Keep the spare battery in your pocket to stay warmand rotate when required.
Digital SLR and Compact System Camera users may want to give their digital sensor a clean before heading out (see Figure 1). There is specialist equipment available to do this yourself, but if you’re not feeling brave, take your camera instore for us to perform a sensor clean for you. For more information click here.
5. Switch to Manual Focus
Autofocus (AF) works best in good light. If you’re having trouble with AF and not getting sharp pictures, chances are it is in low light situations. Switching to manual focus should solve the problem.


6. Use your camera’s motordrive
Although the size of camera LCD screens have got bigger over the years, they are still relatively small compared to the smallest print size e.g. 6×4-inch.
In lower light conditions, the shutter speed of your camera is going to be slower which increases the chance of camera shake spoiling your photos. The image on your camera screen may look sharp at first glance, but once you get home and review your pictures on your computer monitor, or produce a physical print, the picture looks slightly soft/out of focus.
One technique you can try is to put your camera into the continuous shot mode which allows several shots to be taken per second. Compose your photograph as normal, but instead of taking a single photograph hold the shutter down to take a sequence of, say, 5 images
On review, the chances are image 1, 2, 4 & 5 will be slightly out of focus but the middle image, number 3, will be nice and sharp.
7. Turn off Image Stabilisation when using a tripod
If your camera is housed on a tripod, and your camera or lens has image stabilisation (IS), switch it off as having IS switched on can actually result in blurry pictures
8. Read your manual
Darkness is not the time to be learning where your camera menu settings are located. Familiarise yourself beforehand with the functions which you will require and know how to access them quickly.
9. Use maximum aperture
If your camera allows, try putting your camera on Aperture Priority (AV on Canon, A on Nikon) and set to the maximum aperture (smallest number). This will help you achieve higher shutter speeds which you can handhold in low light. If you still need a higher shutter speed, read step 10.
10. Use a fast lens
The speed of a lens and how ‘fast’ it is refers to the maximum aperture of the lens. The larger the maximum aperture, the faster the lens is. Fast lenses tend to be more expensive to buy but really deliver when it comes to low light photography.


11. Use a high ISO setting
When shooting spectacles such as Up Helly Aa from a distance, your built-in camera flash is not going to be powerful enough to reach your subject.
Flash mimics daylight which ruins any atmosphere in your scene. As a result, turn off your flash and increase the ISO setting on your camera. This increases the camera’s sensitivity to light and will result in higher shutter speeds thus reducing the chance of camera shake.
Although increasing the ISO setting on your camera increases noise (grain), it’s much better to have a sharp picture that is slightly grainy than a clean (low ISO value) shot that is out of focus. Modern cameras are very good at higher ISO speeds such as ISO1600/3200 with relatively little noise present.
12. Shoot, shoot, shoot
Digital memory is relatively inexpensive so take lots of photos. Technique number 6 will use up extra storage space but you can always delete them later on.
13. Set camera to highest resolution
It’s possible to take away resolution (make the file size smaller) but you can’t increase the original resolution (make the file size bigger) afterwards, so always take your pictures at the highest possible resolution as you never know when you might want to make that big print enlargement.
14. LCD Illumination
Some cameras have a button which will illuminate the LCD control panel; this can be invaluable in low-light photography. If your camera does not have this function, a small pocket torch can be useful.
15. Minimise Flare
A lens hood can help to minimise lens flare from light entering at angles outside of the frame. If you don’t already have one, you can pick one up in store.
Make sure your lens is completely spotless as any dust/dirt could cause flare when shooting into bright light.
16. Do your research
Up Helly Aa is a busy day, so you’ll need to make sure you know where to be when. A full timetable of the day is available on the official Up Helly Aa page
here.
17. Stay safe
However engrossed you are in your photography, make sure you are aware of your surroundings and stay safe adhering to all marshal directions.
18. Protect your gear
Let’s face it, camera equipment is not cheap! To protect your gear from the risk of heavy rain, get yourself a pack of these rain sleeves from
Camera Centre. It’s a small price to pay to cover your equipment whilst still being able to adjust the camera controls.
19. Take a moment
Up Helly Aa is a very special event, so our final piece of advice is to remember and put the camera down for a moment to smell the paraffin and savour the atmosphere for yourself rather than being permanently stuck behind the lens.
Three cheers to the Guizer Jarl...